
前言
首先说声抱歉,这是一篇亏欠很久的教程,因为我 QQ 群的一些朋友们经常问我,你博客的那些自定义是怎么弄的?其实大部分是我谷歌的,并不是我自己的方法。当然也有一部分是我自己手动写的,比如我的友链。
准备
这篇博客并没有划定适宜人群,只是希望你可以通过此篇教程找到适合你的配置,或者通过我的博客找到一些灵感。这就是这篇教程的意义。
另外,需要说明的是,我的博客是 Next 6.3 版本,也没有采用数据文件夹的形式。为什么呢?因为一开始我不知道
什么?你不知道 Hexo ?来来吃我一发安利
约定
- 如果修改方法很多,我会以 • 方式区分,分步骤则为数字
- 文件路径写在了代码块上部
- 仔细看清站点配置文件和主题配置文件
- 博客文件目录为 root 目录,即包括你的 themes/ 、source/ 文件夹等
- 效果图在每个教程最开头
如果没有就是上面几张显示了不想重复或者是单纯地忘记截了…
个性化配置
修改打赏文字抖动
- 修改文件
themes\next\source\css\_common\components\post\post-reward.styl,将hover注释即可 - 可以在配置文件中添加重叠样式(推荐)
themes\next\source\css\_custom\custom.styl 1
2
3
4//二维码不抖动
#wechat:hover p, #alipay:hover p {
animation: none;
}
修改打赏按钮

在文件中添加代码
themes\next\source\css\_custom\custom.styl 1
2
3
4
5
6
7
8
9
10
11
12
13
14
15
16
17
18
19
20
21//打赏按钮修改
#rewardButton span {
height: 35px;
width: 35px;
//line-height:30px;
font-size: 15px;
font-family: "PingFang SC", "Microsoft YaHei", Georgia, sans-serif;
background: #34495e;
border-radius: 5px;
-webkit-box-shadow: 0 1px 3px rgba(0,0,0,0.12), 0 1px 2px rgba(0,0,0,0.24);
-moz-box-shadow: 0 1px 3px rgba(0,0,0,0.12), 0 1px 2px rgba(0,0,0,0.24);
box-shadow: 0 1px 3px rgba(0,0,0,0.12), 0 1px 2px rgba(0,0,0,0.24);
transition: 0.2s ease-out;
&:hover {
background: #649ab6;
-webkit-box-shadow: 0 8px 16px 0 rgba(0,0,0,0.2), 0 6px 20px 0 rgba(0,0,0,0.19);
-moz-box-shadow: 0 8px 16px 0 rgba(0,0,0,0.2), 0 6px 20px 0 rgba(0,0,0,0.19);
box-shadow: 0 8px 16px 0 rgba(0,0,0,0.2), 0 6px 20px 0 rgba(0,0,0,0.19);
}
}修改文件,将打赏字样改为
themes\next\languages\zh-CN.yml 1
2
3
4reward:
donate: <i class="fa fa-qrcode fa-2x" style="line-height:35px;"></i>
wechatpay: 微信支付
alipay: 支付宝
修改 busuanzi 统计功能
主题配置文件中 busuanzi 项目增加
1
2
3
4
5
6
7
8
9
10
11
12busuanzi_count:
enable: true
site_uv: true #total visitors
site_uv_icon: user
site_uv_header: 访问用户:
site_uv_footer: 人
site_pv: true #total views
site_pv_icon: eye
site_pv_header: 访问次数:
site_pv_footer: 次
post_views: true
post_views_icon: eyeswig 变更为
themes\next\layout\_third-party\analytics\busuanzi-counter 1
2
3
4
5
6
7
8
9<i class="fa fa-{{ theme.busuanzi_count.site_uv_icon }}"></i> 
{{ theme.busuanzi_count.site_uv_header }}
<span class="busuanzi-value" id="busuanzi_value_site_uv"></span>
{{ theme.busuanzi_count.site_uv_footer }}
<i class="fa fa-{{ theme.busuanzi_count.site_pv_icon }}"></i> 
{{ theme.busuanzi_count.site_pv_header }}
<span class="busuanzi-value" id="busuanzi_value_site_pv"></span>
{{ theme.busuanzi_count.site_pv_footer }}
PS: busuanzi 因为在 2018.10.12 左右七牛云域名过期,导致无法显示人数,如果你的主题是旧版本,请在第二步的文件中更新为 src="//busuanzi.ibruce.info/busuanzi/2.3/busuanzi.pure.mini.js"
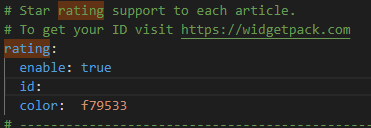
给文章底部加星星
虽然是异步,但访问速度太慢,经常加载不出来
- 在主题配置文件中搜索
rating即可 - 点击此链接注册账号,设置站点后,点击左侧设置,
site建议选私人,rate选择颜色保存即可 - 复制 ID 到配置文件,选择颜色
添加代码,搜索
rating,对比代码blog\themes\next\layout\_macro\post.swig 1
2
3
4
5
6{% if theme.rating.enable %}
<div class="wp_rating">
+ <div style="color: rgba(0, 0, 0, 0.75); font-size:13px; letter-spacing:3px">(>看完记得五星好评哦<)</div>
<div id="wpac-rating"></div>
</div>
{% endif %}修改文章底部留白
添加如下代码themes\next\source\css\_custom\custom.styl 1
2
3
4
5
6.post-widgets {
padding-top: 0px;
}
.post-nav {
margin-top: 30px;
}
侧边栏近期文章
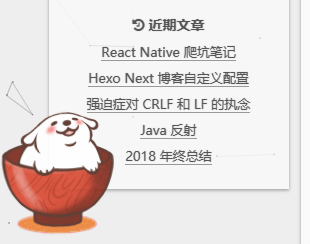
原理:去除友链,将友链换成近期文章
添加如下代码:
themes\next\layout\_custom\sidebar.swig 1
2
3
4
5
6
7
8
9
10
11
12
13
14
15
16{% if theme.recent_posts %}
<div class="links-of-blogroll motion-element {{ "links-of-blogroll-" + theme.recent_posts_layout }}">
<div class="links-of-blogroll-title">
<i class="fa fa-history fa-{{ theme.recent_posts_icon | lower }}" aria-hidden="true"></i>
{{ theme.recent_posts_title }}
</div>
<ul class="links-of-blogroll-list">
{% set posts = site.posts.sort('-date') %}
{% for post in posts.slice('0', '5') %}
<li>
<a href="{{ url_for(post.path) }}" title="{{ post.title }}" target="_blank">{{ post.title }}</a>
</li>
{% endfor %}
</ul>
</div>
{% endif %}在主题配置文件中配置
1
2
3recent_posts_title: 近期文章
recent_posts_layout: block
recent_posts: true
复制文本添加版权信息
在
themes\next\source\js\src新建copy.js,代码如下:1
2
3
4
5
6
7
8
9
10
11
12
13
14
15
16
17
18
19
20
21
22
23function addLink()
{
var body_element = document.body; var selection;
selection = window.getSelection();
if (window.clipboardData) { // Internet Explorer
var pagelink ="\r\n\r\n 原文出自[ Yi-Yun博客 ](yi-yun.github.io) \n除特别声明外,均采用CC BY-NC-SA 4.0许可协议\n转载请保留原文链接: "+document.location.href+"";
var copytext = selection + pagelink;
window.clipboardData.setData ("Text", copytext);
return false;
}
else {
var pagelink = "<br/>原文出自[ Yi-Yun博客 ](yi-yun.github.io)<br/>除特别声明外,均采用 CC BY-NC-SA 4.0 许可协议<br/>转载请保留原文链接: "+document.location.href+"";
var copytext = selection + "<br/>"+pagelink;
var newdiv = document.createElement('div');
newdiv.style.position='absolute';
newdiv.style.left='-99999px';
body_element.appendChild(newdiv);
newdiv.innerHTML = copytext;
selection.selectAllChildren(newdiv);
window.setTimeout(function() { body_element.removeChild(newdiv);},0);
}
}
document.oncopy = addLink;在
next\layout\_layout.swig文件中,添加引用(注:在swig末尾添加):1
<script type="text/javascript" src="/js/src/copy.js"></script>
添加 DaoVioce
很多灵感都是逛博客获得的
注册
首先在 DaoVoice 注册个账号,点击->邀请码是 cbaf2df2。
获取 app_id
点击左侧应用设置->安装到网站
在代码中找到 app_id
修改head.swig
在themes\next\layout\_custom\head.swig添加如下代码
1 | {% if theme.daovoice %} |
修改主题配置文件
文件末尾添加如下代码1
2
3# Online contact
daovoice: true
daovoice_app_id: # 这里填你刚才获得的 app_id
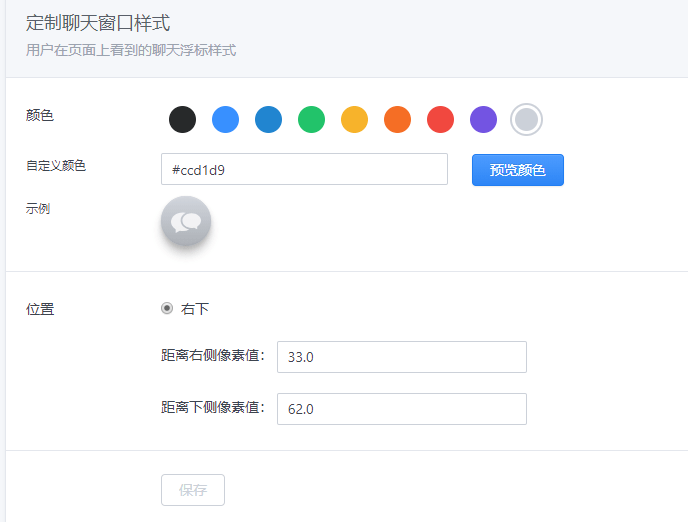
至此,网页的在线联系功能已经完成,hexo s 可查看页面,窗口和位置可自行配置
聊天窗口配置
我的配置
绑定微信
在用户界面点击右上角头像即可扫码绑定,即时通信可在微信小程序中
添加吉祥物
安装依赖
1
2npm install --save hexo-helper-live2d
npm install --save live2d-widget-model-wanko站点配置
1
2
3
4
5
6
7
8
9
10
11
12
13
14
15
16
17
18
19
20
21
22# hexo-helper-live2d配置,参考https://github.com/EYHN/hexo-helper-live2d/blob/master/README.zh-CN.md
live2d:
enable: true
scriptFrom: local
pluginRootPath: live2dw/
pluginJsPath: lib/
pluginModelPath: assets/
tagMode: false
debug: false
model:
scale: 1
use: live2d-widget-model-wanko
display:
superSample: 2 # 超采样等级
width: 100
height: 100
position: left # 位置
mobile:
show: false
react:
opacityDefault: 0.9 # 默认透明度
opacityOnHover: 0.5 # 鼠标移上透明度
网页标题崩溃欺骗
添加 JavaScript 代码
在themes\next\source\js\src文件夹下创建crash_cheat.js,添加代码:1
2
3
4
5
6
7
8
9
10
11
12
13
14
15
16var OriginTitle = document.title;
var titleTime;
document.addEventListener('visibilitychange', function () {
if (document.hidden) {
$('[rel="icon"]').attr('href', "/img/TEP.ico");
document.title = '╭(°A°`)╮ 页面崩溃啦 ~';
clearTimeout(titleTime);
}
else {
$('[rel="icon"]').attr('href', "/favicon.ico");
document.title = '(ฅ>ω<*ฅ) 噫又好了~' + OriginTitle;
titleTime = setTimeout(function () {
document.title = OriginTitle;
}, 2000);
}
});- 引用
在themes\next\layout\_layout.swig文件中,添加引用(注:在swig末尾添加):1
<script type="text/javascript" src="/js/src/crash_cheat.js"></script>
- 引用
文末添加结束标记
1 | <div> |
修改网页底部的桃心
更改主题配置文件中的图标名字即可
1 | icon: |
透明
找到自己相应的 Scheme 下的相关文件,我的是 Piscesthemes\next\source\css\_schemes\Pisces\_layout.styl
- 背景
.content-wrap - 菜单栏
.header-inner
themes\next\source\css\_schemes\Pisces\_sidebar.styl
- 侧边栏
.sidebar-inner
找到 background属性更改为 background: rgba(255,255,255,0.7) 即为透明度30%的白色
更改 sidebar 大小
找到 themes\next\source\js\src\util.js
1 | function updateSidebarHeight(height) { |
可在 height 后加50
底部加上运行时间
在 hexo\themes\[your theme]\layout 文件夹下找到你的 footer 文件
1 | <span id="timeDate">载入天数...</span> |
鼠标爆炸特效
下载这个脚本,放在
themes\next\source\js\src修改代码
themes\next\layout\_layout.swig 1
2
3
4
5{% if theme.fireworks %}
<canvas class="fireworks" style="position: fixed;left: 0;top: 0;z-index: 1; pointer-events: none;" ></canvas>
<script type="text/javascript" src="//cdn.bootcss.com/animejs/2.2.0/anime.min.js"></script>
<script type="text/javascript" src="/js/src/fireworks.js"></script>
{% endif %}打开主题配置文件,在里面最后写下:
1
fireworks: true
SEO
看个人喜好修改,不一定要改的一模一样
首页title优化
更改 index.swig 文件 themes\next\layout
1 | {% block title %} {{ config.title }} {% endblock %} |
修改文章链接
编辑站点 _config.yml 文件,修改其中的 permalink 字段改为 permalink: :title.html 即可。
添加“nofollow”标签
修改代码
\themes\next\layout_partials\footer.swig 1
2{{ __('footer.powered', '<a class="theme-link" href="http://hexo.io" rel="external nofollow">Hexo</a>') }}
<a class="theme-link" href="https://github.com/iissnan/hexo-theme-next" rel="external nofollow">同理,sidebar.swig也作如下修改
1
2<a href="http://creativecommons.org/licenses/{{ theme.creative_commons }}/4.0" class="cc-opacity" target="_blank" rel="external nofollow">
<a href="{{ link }}" target="_blank" rel="external nofollow">{{ name }}</a>
推荐工具
- Visual Studio Code
- Chrome 浏览器(不接受反驳)
- 博客图床解决方案
参考链接
很久以前的事情了…有些参考链接找不到了,有侵权的请联系我补。